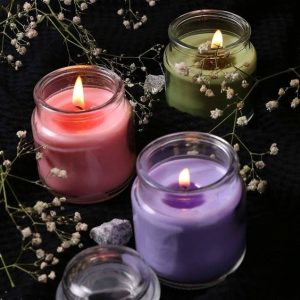
This guide offers valuable insights into the art of candle-making, providing a comprehensive overview for individuals embarking on the journey of creating and selling homemade candles.
Candles hold a universal charm, catering to diverse preferences with options ranging from delightful pumpkin spice scents to the deeper aromas of leather and tobacco. Whether illuminating a cozy evening or enhancing home decor, candles have an appeal that resonates with many.
For those venturing into the realm of candle-making as a business, choosing the right candle types to craft and sell is both an exciting and occasionally challenging aspect of the endeavor. With a plethora of fragrances, waxes, and decorative elements like pressed flowers available, the process demands careful planning and creative energy. However, crafting candles at home can be a straightforward task with meticulous planning, suitable tools, and a touch of creativity. Your discerning customers, appreciative of your unique contributions to their living spaces, will undoubtedly cherish your creations.
Essential Materials
To embark on the candle-making journey, gathering the necessary materials is paramount. Here’s an overview of the supplies required for homemade container candles
1. Wax: Candle wax, available in shavings or flakes, can be procured in bulk online or from local craft stores. Popular choices include paraffin wax, beeswax, and soy wax.
2. Wicks: Every candle necessitates a wick, which can be made from paper, cotton, zinc, or wood.
3. Fragrance Oils: Scented candles derive their aromatic charm from essential oils or fragrance oils, seamlessly blended into the melted wax during the candle-making process.
4. Spatula: A heat-proof spatula ensures even stirring of the wax, facilitating a uniform melt.
5. Heat-proof Container: Candle containers, ranging from Mason jars and glass jars to tin cans, serve as ideal vessels for your creations. The size of the container dictates the candle’s dimensions.
6. Double Boiler: This kitchen tool facilitates controlled warming, ensuring an even melt of the wax. A store-bought double boiler or an improvised version, with a metal bowl placed atop a pot of water, suffices for this purpose.
7. Thermometer: Accurate temperature measurement of the wax is crucial. Utilize a candy thermometer, a digital infrared thermometer, or a deep-fry thermometer for this purpose.
8. Supportive Objects: Popsicle sticks, pencils, or chopsticks are employed to stabilize the wick during the curing process.
9. Paper Towels: Essential for cleaning up wax drips, paper towels safeguard your work surface from unwanted spills.
Ten Key Steps for Candle-Making
Follow these steps meticulously to create your candles successfully
1. Prepare Containers and Supplies: Ensure your chosen candle containers are clean and dry, placing them on a flat surface. Keep wicks, fragrance oils, and supportive objects within reach.
2. Measure the Wax: Pour wax flakes or shavings into your candle containers, serving as molds. Approximately two containers’ worth of flakes per candle suffice.
3. Melt the Wax: Utilize a double boiler to melt the wax, stirring it with a spatula. Monitor the temperature using a thermometer.
4. Add Fragrances: For scented candles, unleash your creativity by blending essential oils or fragrance oils into the melted wax, stirring gently.
5. Place the Wick: Position a wick in each container, securing it at the center bottom. Ensure the wick’s base is centered for an even burn.
6. Stabilize the Wick: Prior to pouring the wax, place supportive objects across the container’s top, sandwiching the wick between them to maintain its upright position.
7. Pour the Wax: Carefully pour the melted wax into the container, avoiding air bubbles. A slow pour minimizes bubble formation.
8. Clean Up: Swiftly wipe away any wax drips using paper towels. Hot water aids in cleaning hardened wax spills.
9. Wait for Candle Cure: Depending on the wax type, candles cure at varying rates. Soy candles typically take four hours to harden and three to four days to cure fully. Paraffin wax candles require around two days to cure, while beeswax candles may take up to 10 days. Once dry, remove supportive objects and trim the wick.
10. Light Your Candle: With the candle cured and perfected, it’s time to light it up! Candles, serving as delightful gifts or online store offerings, infuse spaces with aromatic ambiance, making them a cost-effective method to enhance your home’s atmosphere.
Embrace the art of candle-making, and let your creations illuminate spaces and hearts alike, providing a touch of charm and tranquility to any environment.


